GUIDE
Get started with Chaser in just 5 steps
Add users
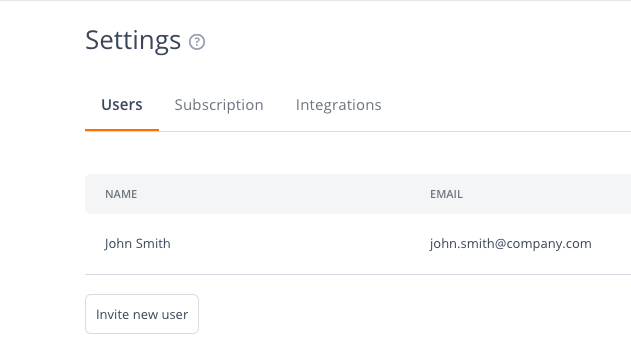
If you'd like to add any colleagues to help manage your Chaser account, you can invite them to do so.
Click the settings cog (in the top right corner) then Organisation settings.
Click Invite new user. We'll email them a link to sign up and they'll be added to the list of users for your organisation.
Set up your chaser senders
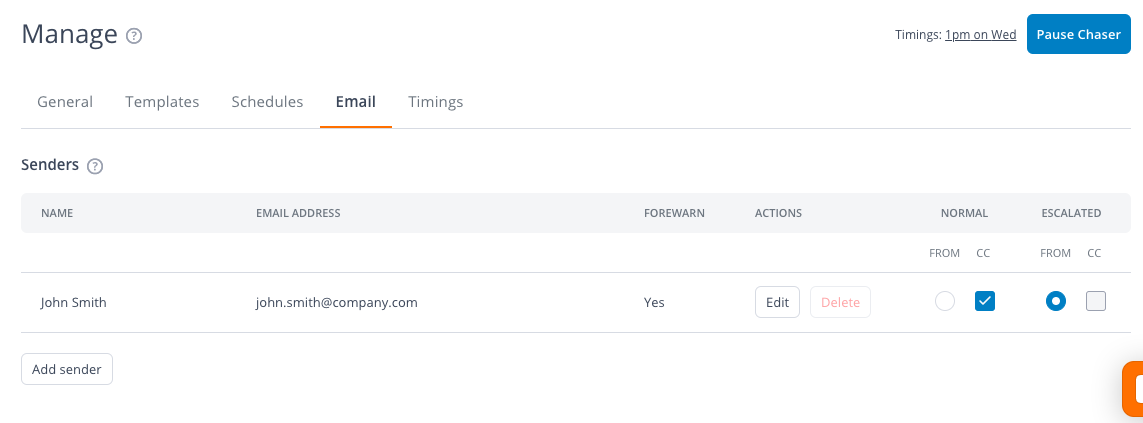
The person that sets up your Chaser account will automatically be set as the sender.
To select a new sender, click Manage, then select the Email tab.
From the email tab, you can add senders and select if they are a normal or an escalated sender.
Check your templates
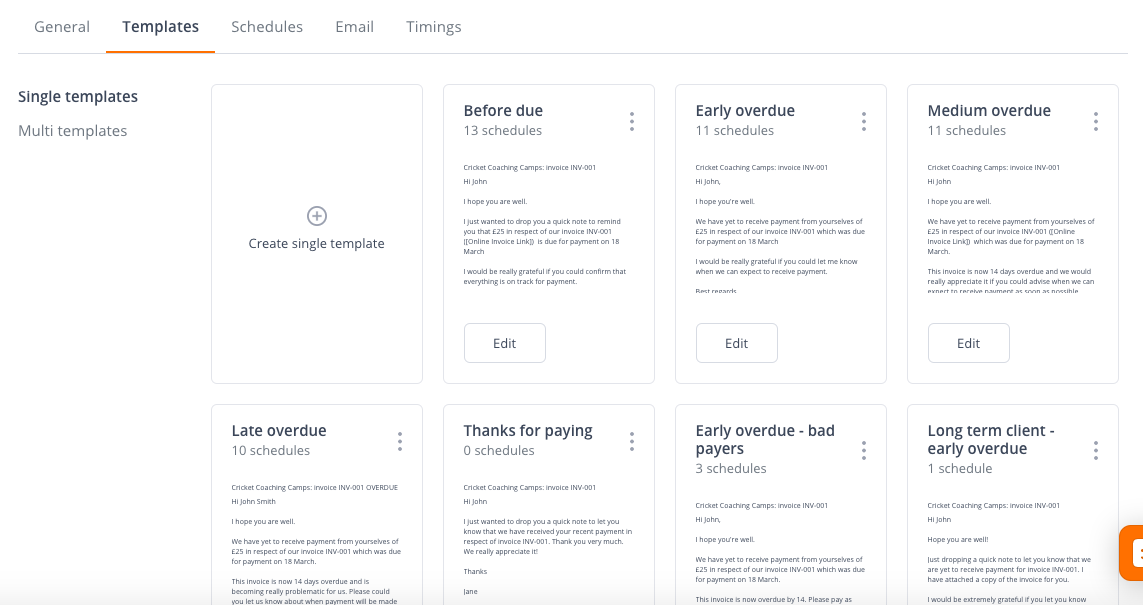
Click Manage then select Templates to view all your chasing templates.
Open templates by clicking on them. You can check your templates and edit them to fit your business' communication style.
Add placeholders
Placeholders can be seen on the right of the template text editor.
They're automatically populated by information specific to your customer's business, the recipient, or the invoice you're chasing. For example, in each chaser, the placeholder <invoice_refnum> is replaced by the reference number of the invoice being chased.
Place your cursor in the area of the email you would like to add a placeholder, and click to add.
Click Save template.
.webp)
View your schedules
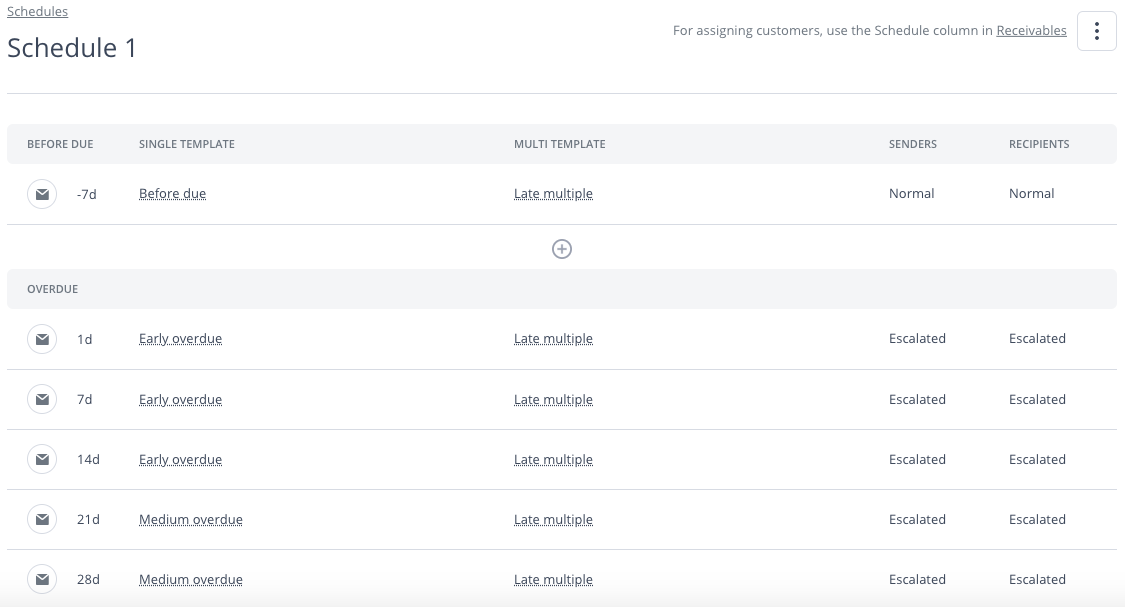
Click Manage then Schedules and select one of the existing schedules.
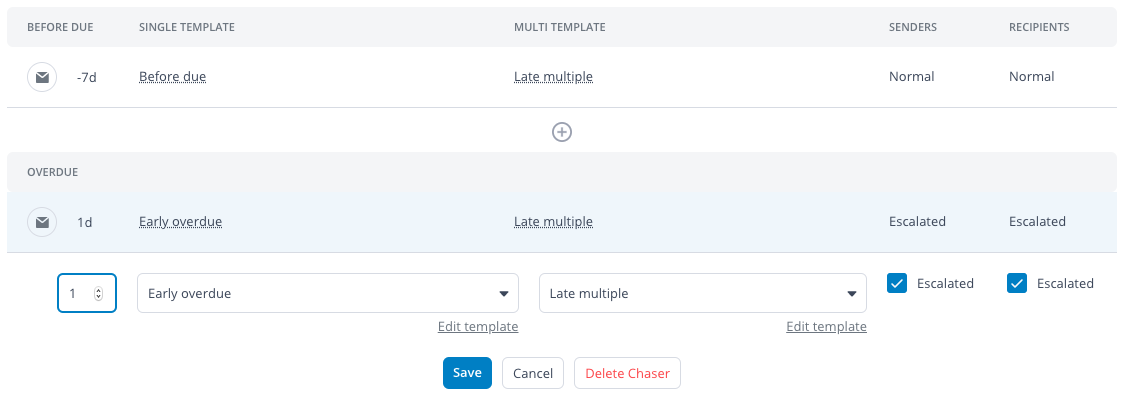
Each row represents a chaser. In the first column, you can see when each chaser is sent in respect to the invoice due date.
If a customer has more than one unpaid invoice, Chaser automatically groups these together when chasing.
You can preview which single templates and multi templates will be sent at each stage.
Optimise your schedules
To change your chasing intervals, switch templates, or select an alternative sender, click the relevant row and the editing drop-down will appear.
You can also delete or edit templates from the editing drop-down.
Review 'thanks for paying' messages
At the end of your schedule, you'll see a scheduled 'thanks for paying message'. You can choose to edit or delete this message by clicking on this row and using the editing drop-down.

Pick a time and day
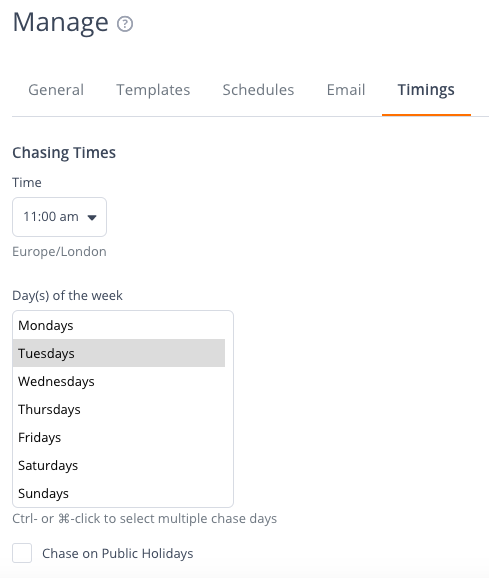
Click Manage then select Timings. Pick your preferred chasing times and days, we recommend lining this up with after you do your bank reconciliation.
Select your customers
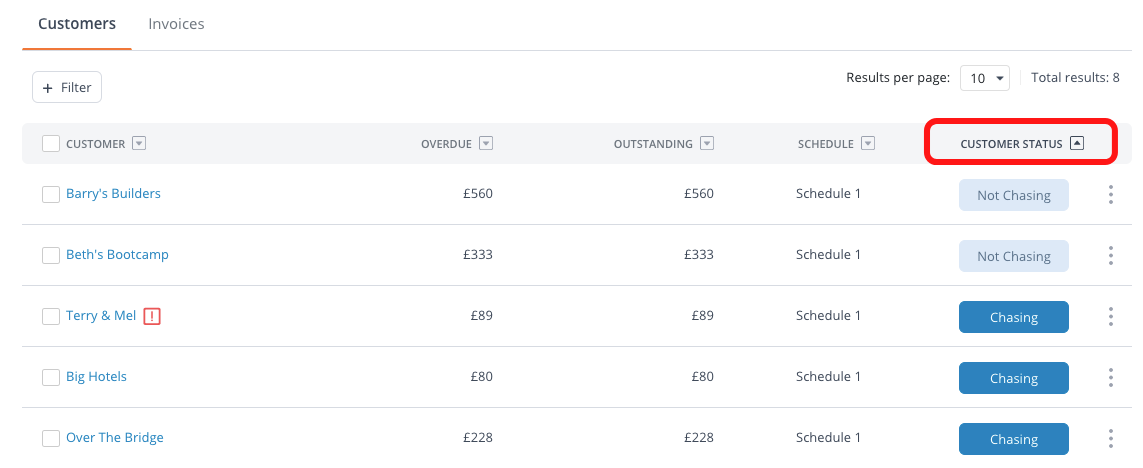
Click Receivables and you'll see a list of your customers.
To see the customers you aren't chasing, click the filter arrow on the Customer status column.
Select all the customers you want to chase by clicking the checkboxes on their row.
Once selected, a blue drop-down button will appear on the top left of your customers tab. Click on the tab and select Start chasing.
Make sure your chasers get sent
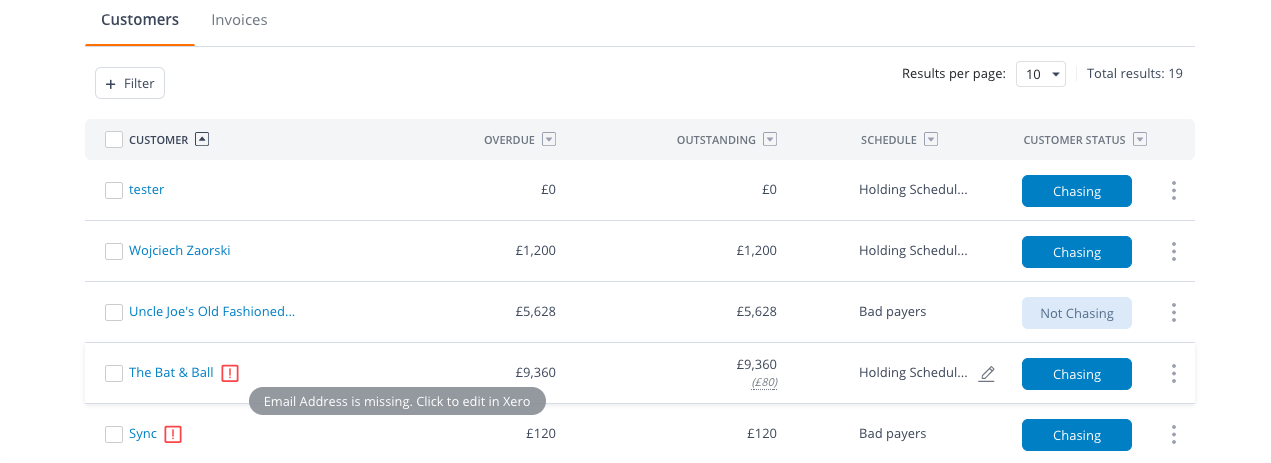
On the receivables tab, if you see a warning symbol next to any of your customers, it means chasers won't be delivered to them.
To solve this, click on the warning symbol to add a name and email address for that contact.
Let's start chasing!
Click Resume Chaser at the bottom of your page to enable chasing.


